How to Apply Foundation, Concealer & Contour Like a Pro: Step-by-Step Guide

You can create a smooth, natural base that lasts and flatters your features by prepping skin, picking the right shades, and using simple application steps for foundation, concealer, and contour. Match your foundation and concealer to your skin tone, blend where the light naturally hits, and use slightly darker and lighter shades to sculpt without harsh lines — those moves give you a polished look without heavy makeup.
This guide walks you through how to ready your skin, choose products, apply foundation and concealer for specific concerns, and add subtle contour and highlight to shape your face. Follow clear techniques and pro tips to make each step faster and more reliable, so your finished look feels like the best version of your skin.
Prepping Your Skin for a Flawless Base

Start with clean, hydrated skin and a targeted primer to control oil or add glow. These steps help your foundation, concealer, and contour sit smoothly and last longer.
Cleansing and Moisturizing
Wash your face with a gentle cleanser that matches your skin type—gel or salicylic for oily skin, cream or hydrating for dry skin. Clean skin removes oil, sweat, and product buildup so foundation doesn’t slip or cake.
Exfoliate 1–3 times a week if you have texture or flakes. Use a gentle chemical exfoliant (AHA/BHA) for most skin types, and a mild physical scrub only if your skin tolerates it. This smooths the surface so foundation blends evenly.
Apply a lightweight moisturizer and let it absorb for 1–2 minutes. For oily skin, choose a gel formula; for dry skin, pick a richer cream. Add a nourishing eye cream to prevent concealer from creasing under your eyes.
Priming for Longevity
Choose a primer based on skin needs: mattifying for oil control, hydrating for dry skin, or pore-filling for texture. A small pea-sized amount spread evenly across the T-zone and cheeks gives the best grip for foundation.
Press primer into the skin with fingertips rather than rubbing to avoid disturbing moisturizer. Wait until the primer sets—about 30–60 seconds—before applying foundation to prevent pilling and to lock in longevity.
If you want extra staying power, use a thin layer of a silicone-based primer under makeup-prone areas, and a hydrating primer on any dry patches. This targeted approach helps you achieve a more flawless complexion and makes it easier to shop now for the right products.
Choosing the Right Products and Shades
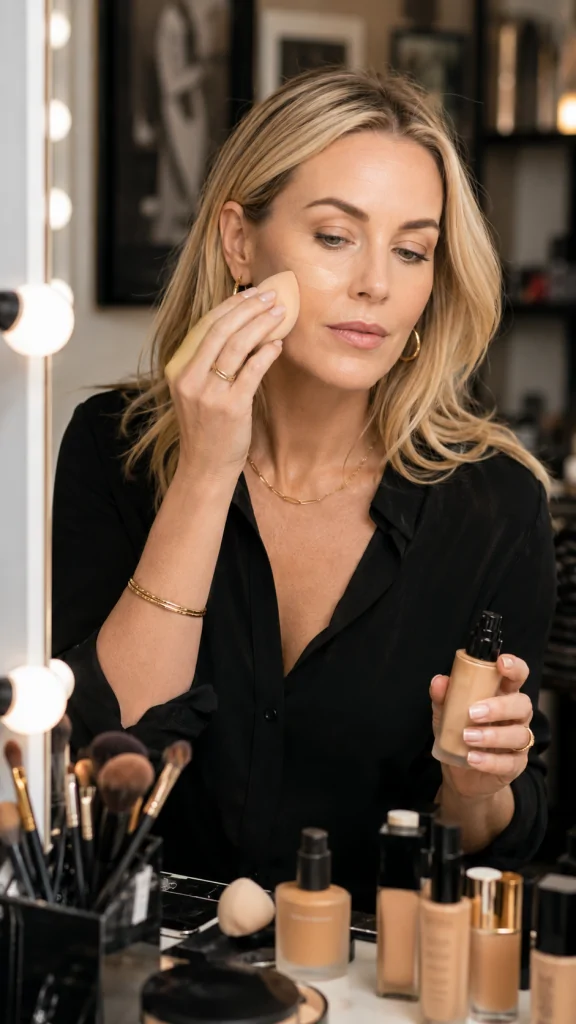
Pick formulas that match your skin type and pick shades that blend seamlessly into your jawline and neck. Focus on three things: a foundation finish you want, a concealer shade for coverage or brightening, and a contour product that reads natural on your skin.
Selecting Foundation and Concealer
Choose a foundation finish first: matte foundation if you have oily skin or need shine control, and a hydrating or dewy formula if your skin is dry. Match shade by testing along your jawline in natural light; the best match should disappear into your neck without leaving a line.
For coverage, pick a liquid concealer that gives the finish you need. Use a concealer one shade lighter than your foundation to brighten under-eyes, or the same shade for spot coverage. If you can, try new arrivals at a counter or use a tool like ColorSonic to sample shades before buying.
Look at undertones too: warm (gold/yellow), cool (pink/blue), or neutral. Keep foundation and concealer undertones consistent so they layer without looking muddy. Buy a small size or sample first if you’re unsure.
Understanding Color Correcting
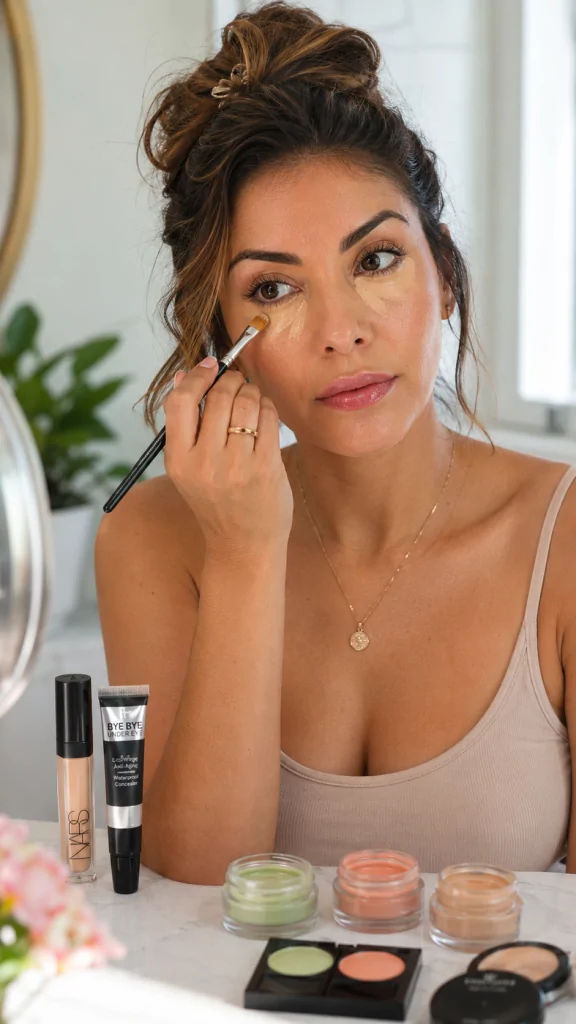
Color correcting fixes specific tones before you apply foundation and concealer. Use a peach or salmon color corrector for blue under-eye circles on fair to medium skin. Use an orange or red corrector for deeper skin tones with dark under-eyes.
Green correctors reduce redness from blemishes or rosacea. Apply a thin layer only on the discolored spot and blend gently. Let the corrector sit 20–30 seconds, then layer foundation or a skin-toned concealer over it to avoid shifting the product.
Keep it light: a little color corrector goes a long way. Use products specifically labeled color correct or color corrector to avoid mixing pigments that cancel each other out.
Matching Contour Products to Your Skin Tone
Pick a contour product that is 1–3 shades darker than your foundation and has a cool or neutral undertone. Cool-toned contour looks like a natural shadow; warm-toned bronzers can read orange if they’re too warm for your skin.
Choose the product type based on skin type and finish. Cream contours work well under liquids and blend into dewy or natural bases. Powder contour suits matte foundation and higher-coverage looks. Test on your jawline or cheek hollows and blend fully to avoid lines.
If you use multiple complexion products—foundation, concealer, and contour—keep undertones consistent. That prevents muddiness when you layer. Consider trying ColorSonic or sampling new arrivals in-store to find the best match before committing.
Flawless Foundation Application Techniques
You’ll learn which tools give the smoothest finish and the exact steps to blend without streaks, cakiness, or harsh lines. Use the right product amount, apply in the right order, and set strategically for a long-lasting, natural look.
Tools and Methods for Seamless Coverage
Choose your tool based on coverage goals. Use a dense synthetic brush for fuller coverage and precise application. A damp makeup sponge gives a skin-like, airbrushed finish and helps sheer out heavy formulas. Your fingers work when you need quick, light coverage—warm them first for better blending.
Prep tools before use. Dampen sponges, clean brushes weekly, and tap excess product off the brush to avoid streaks. Apply foundation in thin layers: start at the center of your face and blend outward toward your hairline and jaw to avoid a line of demarcation.
Keep product control. Pump or dot foundation onto the back of your hand, then pick up with your tool to prevent over-application. For problem areas, layer a little more rather than one thick coat. If you want to shop now, look for multi-use brushes and sponge sets that pair with your foundation type.
Tips for Even and Natural Results
Match shade and finish to your skin. Test foundation on your jawline in natural light and choose the closest match. Pick a finish—matte for oily skin, dewy for dry skin—to keep your complexion looking natural, not flat.
Prime and prep properly. Use a lightweight moisturizer and a primer suited to your skin concerns (pore-filling, hydrating, or mattifying). This creates an even base and helps the foundation last longer.
Blend with intent. Use short, stippling motions with a brush or bounce the sponge to press product into skin. Blend down the neck and along the hairline. Set only the T-zone or under eyes with a light dusting of translucent powder to avoid cakiness.
Correct, don’t cover. Use color-correcting concealer under the foundation only for heavy discoloration, or apply concealer after foundation for targeted coverage. Finish by checking in daylight to ensure a flawless complexion and adjust coverage as needed.
Concealer Application Steps for Different Concerns
Start with clean, moisturized skin and a matched liquid or cream concealer. Use a light hand, build coverage in thin layers, and blend by tapping. Pick color correctors only for strong discoloration and set with translucent setting powder or setting spray.
Brightening the Under-Eye Area
Use a lightweight, hydrating concealer one shade lighter than your foundation for under-eyes. Apply small dots in a triangular shape with the base at your lower lash line and the point toward your cheek to lift and brighten.
Tap the product gently with a damp sponge or your ring finger. Avoid rubbing; pressing blends product without removing it. If your under-eye skin is dry, apply a thin eye cream first and wait 30–60 seconds.
For severe darkness, use a peach or salmon color corrector under the concealer. Apply the corrector sparingly, blend it out, then layer concealer on top. Finish with a dusting of fine translucent setting powder to prevent creasing.
Covering Blemishes and Redness
Match a concealer to your skin tone for spots and redness. Use a small, pointed brush or a concealer wand to place product directly on the blemish. Keep the layer thin to avoid drawing attention.
Pat the concealer into the spot and blend only the edges into your foundation. For very red blemishes, dab a tiny amount of a green color corrector first, then apply skin-toned concealer. Let each layer dry slightly before adding more.
Avoid spreading concealer over a wide area; that can reduce coverage and look cakey. If you wear foundation, apply it before spot concealing for better adhesion, unless you use full-coverage concealer under thin foundation.
Layering and Blending
Work from thin to thicker layers. Start with a light base of concealer where needed, then add small amounts only where extra coverage remains. This builds a natural, flawless complexion without heavy texture.
Blend edges with a damp sponge using tapping motions. For under-eyes, blend toward the cheek to avoid a mask. For blemishes, blend only outer edges so the spot stays covered but the surrounding texture stays natural.
Use matching formulas: liquid concealer pairs well with liquid foundation, cream concealer pairs with cream or thicker bases. Mixing formulas can cause slipping or pilling, so keep products consistent.
Setting Concealer for All-Day Wear
Lock concealer with a light dusting of translucent setting powder to stop creasing and transfer. Use a small fluffy brush or a micro sponge for precision under the eyes and on spots.
Press powder gently into the skin rather than sweeping. For long days, follow with a spritz of setting spray to melt powder into skin and increase longevity. Avoid heavy powder layers; they can dry out under-eye skin and settle into fine lines.
If you need extra hold, layer a very thin powder, then repeat blending with a sponge to soften any powdery finish. This keeps coverage intact while still looking natural.
Contouring and Highlighting for a Sculpted Look
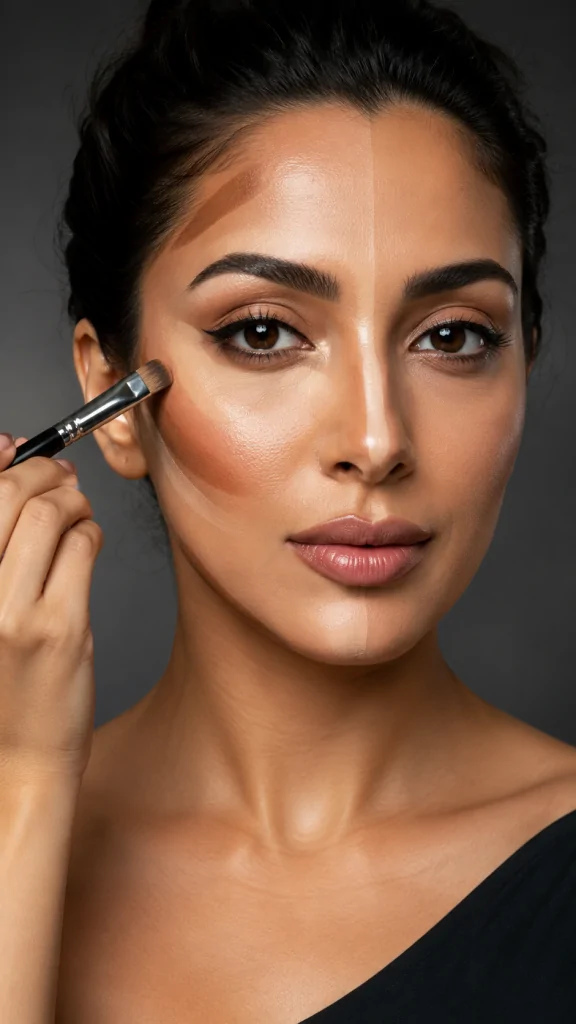
Use darker shades to create shadow where you want to slim or define, and lighter shades to bring forward the parts you want to lift. Match product type to your skin and blend well so lines disappear.
How to Contour by Face Shape
Identify your face shape first: oval, round, square, heart, or long. For a round face, apply contour in a soft diagonal from the ear toward the corner of the mouth to slim the cheeks. For a square face, focus contour along the temples and jawline to soften angles.
If you have an oval face, place contour under the cheekbones and slightly at the hairline to keep balance. Heart-shaped faces benefit from contour at the lower temples and under the chin to reduce a wide forehead and pointy chin. For a long face, contour along the hairline and under the chin to shorten the appearance vertically.
Use a small angled brush for precision on cheek hollows and a fluffy brush for the hairline and jaw. Start light and build up; step back and check in natural light to avoid overdoing it.
Choosing Between Powder and Cream Contour
Pick cream contour if you have dry skin or want a dewy finish. Creams blend smoothly with liquid foundation and work well under setting powder. Apply with a damp sponge or synthetic brush and blend outward to avoid harsh edges.
Choose powder contour for oily or combination skin and for longer wear. Powders layer easily over foundation and set quickly. Use a small, dense brush for the hollows of the cheeks and a larger brush to diffuse along the hairline.
If you mix types, apply cream first and set with a matching powder to increase lasting power. Match the contour shade to your undertone: cool-toned deeper shades look natural on cool undertones; warmer brown tones suit warm undertones.
Highlighting High Points for Dimension
Apply highlighter or a lighter concealer to the high points: tops of cheekbones, bridge of the nose, brow bone, cupid’s bow, and center of the forehead. Use a small brush or fingertip for precise placement.
For a natural sculpted look, choose a highlight one to two shades lighter than your skin. Matte or satin finishes work for a subtle lift; luminous or shimmery highlighters add glow for photos or evening looks.
Blend the edges of your highlight into the surrounding foundation and contour so there are no lines. Lightly tap product rather than dragging to keep coverage even. Set cream highlights with a thin layer of matching powder to lock them in without reducing dimension.
Finishing Touches and Pro Tips

Finish with small, targeted steps that lock your work in place and keep it looking natural. Focus on blending edges, setting products where they crease, and fixing common problems like cakiness or shine.
Blending for a Seamless Finish
Blend in thin layers and build coverage only where you need it. Use a damp sponge for cream or liquid foundation and concealer; press and bounce to smooth product into the skin. Work from the center of your face outward so edges near the hairline and jawline disappear.
For contour, apply product under cheekbones, at the temples, and along the jaw, then buff with a dense brush or sponge. Blend upward and outward to avoid harsh lines. Use small circular motions on cream contour and light feather strokes with powder.
Check in different light sources and at arm’s length. If a line shows, soften it by lightly tapping a clean sponge over the area. This keeps your complexion looking airbrushed without losing texture.
Setting Your Makeup
Set areas that crease or get oily with a translucent setting powder. Tap a small amount under the eyes, on the T-zone, and where concealer folds. Use a fluffy brush to dust powder thinly; too much causes a cakey finish.
For longer wear, apply setting powder only where needed and finish with a setting spray. Hold the bottle 8–10 inches from your face and mist in an X and T pattern. A light mist melts powder into the skin and reduces powdery flash in photos.
Carry a pressed powder or blotting sheets for midday touch-ups. Press, don’t rub, to avoid moving foundation. These steps help maintain a flawless complexion through the day.
Troubleshooting Common Issues
If your foundation looks cakey, remove excess product with a damp sponge and add a hydrating mist to reset the base. Overdry skin benefits from a balm or lightweight oil before reapplying a thin layer of foundation.
If concealer creases under the eyes, apply a small dab of hydrating eye cream first, let it sink in, then use less concealer and set with a light dusting of translucent powder. For dark spots that still show, layer a tiny bit of color-matching concealer and tap to blend.
If you get unwanted shine, blot with oil-absorbing sheets and lightly reapply powder only where oily. For patchy or uneven color, gently buff the area with a damp sponge and add a thin layer of product rather than more heavy coverage.
Frequently Asked Questions
This section gives clear, practical answers for tools, shade selection, step order, long-wear tips, and common mistakes. Each answer lists small, usable steps you can try right away.
What are the essential tools needed for a professional foundation, concealer, and contour application?
You need a damp makeup sponge, a flat or rounded foundation brush, and a small dense concealer brush. The sponge helps sheer and blend liquids, the foundation brush gives coverage and evenness, and the concealer brush targets small areas.
Include a fluffy blending brush or stippling brush for cream contour and a small angled brush for precise cream contour lines. Finish with a large fluffy powder brush and a damp kabuki or sponge for pressing powder if you set heavily.
Keep clean tools: wash brushes weekly and replace sponges every 1–3 months. Clean tools prevent patchy blending and skin irritation.
How do I determine the right shades of foundation, concealer, and contour for my skin tone?
Test foundation along your jawline in natural light. The right shade should disappear into your skin without leaving a line.
Choose concealer one shade lighter than your foundation for brightening under the eyes, or match your foundation for spot coverage. Use a color corrector (peach/orange for dark circles, green for redness) only where needed.
Pick a contour shade 1.5–2.5 shades darker than your foundation with a cool or neutral undertone. Avoid very warm or orange tones for contour; they look like bronzer rather than shadow.
What is the correct order of application for foundation, concealer, and contour?
Start with skincare: moisturizer and SPF first, then primer if you use one. Good skin prep keeps your products smooth and long-lasting.
Apply foundation next to even out skin tone. Use thin layers and build coverage only where you need it.
Apply concealer after foundation to target under-eye darkness and blemishes; blend edges into the foundation. Do cream contour and bronzer next, then cream blush and highlight. Set targeted areas with powder if required, and finish with a setting spray.
How can I make my foundation, concealer, and contour last all day?
Use a primer that matches your skin needs: mattifying for oily skin, hydrating for dry skin. Primer creates a better surface for makeup to grip.
Layer thin products and set creamy products with a light dusting of translucent powder. Press powder with a sponge where you crease or get oily.
Finish with a setting spray to reduce powdery finish and lock products in place. Touch up selectively with blotting papers or a small dab of concealer and powder in oily zones.
What are the common mistakes to avoid when applying foundation, concealer, and contour?
Using too much product at once causes caking and uneven texture. Start with less and build slowly.
Matching shades in artificial light or only on your wrist can lead to the wrong color. Always check shade matches in daylight and on your jawline.
Blending poorly at edges creates visible lines around the jaw, hairline, and under the cheekbones. Blend outward and down to avoid harsh edges.
Using warm, orange contour shades instead of cooler, shadow-like tones makes contour look like bronzer. Pick cooler, muted tones and apply them where natural shadows fall.